Welcome to this 3rd chapter on dental implant placement. In this chapter we will talk about the dental implant procedure. We are sure that after learning all you need to know about dental implants and their different types, you will be able to make the best decision for your oral health. So let’s take our guide one step further. What should you know about dental implant placement?
The first part of the preparation process for dental implant placement can take a bit of your time and require you to make some important decisions. You will first have to choose the person to whom you will entrust your smile and your mouth. You will need a dentist who specializes in implantology. After making this decision, it will be necessary to determine the area to be treated and establish a treatment plan. You will need to take stock of your current situation but also of your medical history. It is important to always have an overview of the patient’s medical file.
You will definitely need panoramic x-rays of the area to carefully examine the bone, nerves and sinuses. In addition, the gums must be examined to determine their condition as well as that of the teeth to ensure that there are no cavities or infections. These types of issues will need to be addressed before the dental implant procedure begins.
Also, it should be noted that if the amount of jaw bone is insufficient, dental bone grafting or sinus lift may be needed to build bone density.
A tooth extraction may be considered during the day if you wish or need it.
Installing the implant
When the big day to start dental implant placement arrives, you may experience anxiety and fear regarding the implant process. It’s time to insert the artificial root. So let’s talk about what’s going to happen so that your apprehensions go away and you can relax before the procedure begins.
The dental surgeon will first start by measuring and marking the distance between the top and the base of the teeth and jaw naturally present in the case of a dental implant. The distance between the two should be the same at the end of the procedure. This guarantees a natural feeling, the same facial structure and good chewing ability.
If you have severe anxiety and want a calmer procedure, the dentist may give you a sedative to help. You will not feel any pain, but you will hear annoying noises typical of a dental office. While the anesthesia is taking effect, your dentist will talk to you about the procedure as well as its different stages, the estimated duration of the intervention, and advice on the habits and gestures to adopt after the intervention.
The procedure then begins. In this part, we will talk about the endosseous implantation procedure, also known as the endosseous implantation procedure (you can learn more about the latter by checking out Chapter 2).
The surgeon incises the gum to reveal the bone. He then makes a hole in the bone to create enough space to insert the metal screw (usually a titanium post), the dental implant or the artificial tooth root. Finally, the gum is closed with stitches to protect the area.
Indeed, it will be essential not to let food and bacteria come into contact with the bone and the implant, in order to avoid infections.
The operation is thus coming to an end. You will be free to go home avoiding eating or drinking for a few hours.
Healing time after the first procedure
Once the first stage of dental implant placement is complete, it will be time for you to take care of your implant. Now is when the healing begins. It can take up to 6 months, when the patient takes proper care of their oral health.
During this time, osseointegration (bone integration) takes place. What is osseointegration?
The process of osseointegration is the creation of structural and functional connections between the jaw bone and the dental implant. Put simply: the bone accepts the implant as part of it, so they fuse together without rejection. This result is obtained if and only if the right material biocompatible with the bone is placed, such as titanium and zirconia. These materials have the highest success rate because they are 100% biocompatible.
Dental implant abutment installation procedure
Once the healing procedure is complete, it is time to install the abutment. The procedure may require a second operation to open the gum if a two-step procedure was used. The second surgery is less invasive and cumbersome than the first, again you will only need local anesthesia. It is only an outpatient procedure.
Once the abutment is in place, the gumline will be surrounded by stitches, but not over the abutment. The dentist will not close the gum at the level of the abutment. It will only be closed on the sides to prevent bacteria or food crumbs from passing through.
This is the case of teeth in a day, for example.
The healing process for dental implant abutments varies, but generally takes two to three weeks.
Placement of the dental prosthesis
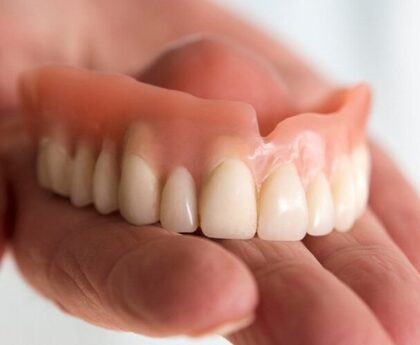
Regardless of the type of dental prosthesis you have chosen, it is time to put it in place. During the weeks of healing, you will have temporary prostheses. Temporary prostheses (crowns, bridges, or dentures) are used during the weeks of healing between the abutment and the placement of the prosthesis.
These behinds will be removed, and permanent dentures will be put in place. Once this procedure is complete, you will not have to undergo any further procedures or visits to your dentist.


