
It could be difficult to find time in the daily shuffle to take care of yourself. But you don’t have to go to a spa to reap the rewards of a revitalising and calming facial. You can create an abundant spa experience right in your home with a few easy steps and the correct products. With the help of this tutorial, you can perform a do-it-yourself facial at home and get gorgeous skin.
Step 1: Exfoliation
Exfoliation is an essential part of any face practice to remove dead skin cells, clear pores, and encourage cell turnover. Select a mild exfoliant based on your skin type. Use a gentle scrub or a natural exfoliator like oats if you have sensitive skin. An exfoliation that is a little bit more abrasive can be used on normal or oily skin. Apply the exfoliant to your damp skin in gentle circular motions, paying particular attention to the nose and chin, which are areas that are prone to congestion. Rinse well under warm water to reveal a brighter, smoother complexion.
Step 2: Steaming
Steaming your face opens up your pores, facilitating the removal of pollutants and the absorption of skincare products. To capture the steam, cover your head with a towel as you bend over a basin of boiling water. Allow the warmth of the steam to soothe your skin and release any trapped oil and grime for five to ten minutes. This procedure simulates the results of expert steam treatments that can be obtained in spas.
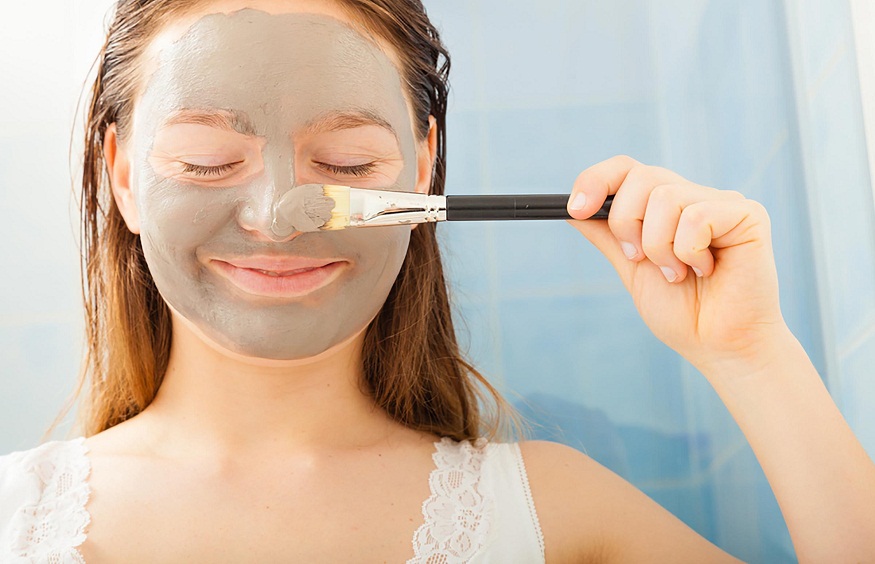
Step 3: Applying the Mask
After steaming, it’s time to apply a face mask that suits your skin type. Clay masks absorb excess oil and unclog the pores, making them great for oily and acne-prone skin. Hydrating masks are great for dry skin since they give the skin the hydration and nutrition it needs. Avoid the sensitive area around your eyes and apply the mask evenly across your face. After the suggested duration of 10 to 20 minutes, remove it with lukewarm water. Your skin will have a renewed sense of vitality.
Step 4: Facial Massage
A facial massage is a soothing and helpful procedure that encourages lymphatic drainage and enhances circulation. Apply facial oil with clean hands, and gently massage your face in circular upward strokes. Particular attention should be paid to tense areas like the jawline and temples. In addition to feeling amazing, this massage tones the muscles in your face and improves the general radiance of your skin.
Step 5: Applying Final Touches and Moisturising
Applying moisturiser and sealing in the advantages of the preceding stages completes your do-it-yourself beauty routine. Apply a moisturiser that is appropriate for your skin type gently to your face and neck. Use a serum or face oil before your moisturising product for an added boost. Your skin will look plump and radiant after doing this to seal in moisture. If you want to imitate the opulent atmosphere of a Babor facial in Singapore, think about employing premium products with added advantages like brightening or anti-ageing properties.
Conclusion
A DIY facial at home is a great way to pamper yourself, take care of your skin, and de-stress. You may create a spa-like experience at home without paying for expensive treatments by doing five easy steps: exfoliation, steaming, mask application, face massage, and moisturising. Making the time to give yourself a do-it-yourself facial not only enhances the appearance and health of your skin but also offers a much-needed respite from the strains of daily life. Savour the procedure and revel in your well-kept skin’s shine.